MECCA MAX Modular

Part 1 Single shadows and DIY palettes
Part 2 Lego makeup and tiles
Part 3 Cracking eggs to make an omelette

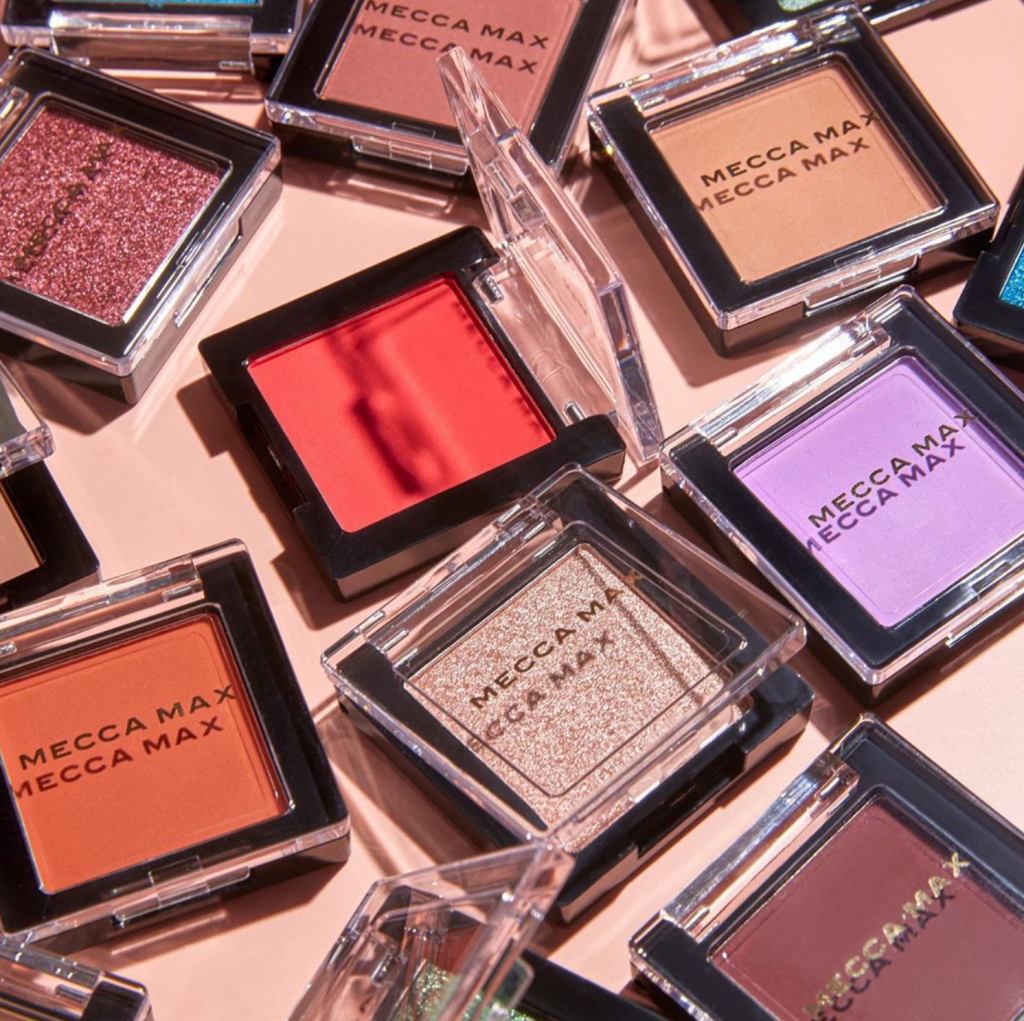
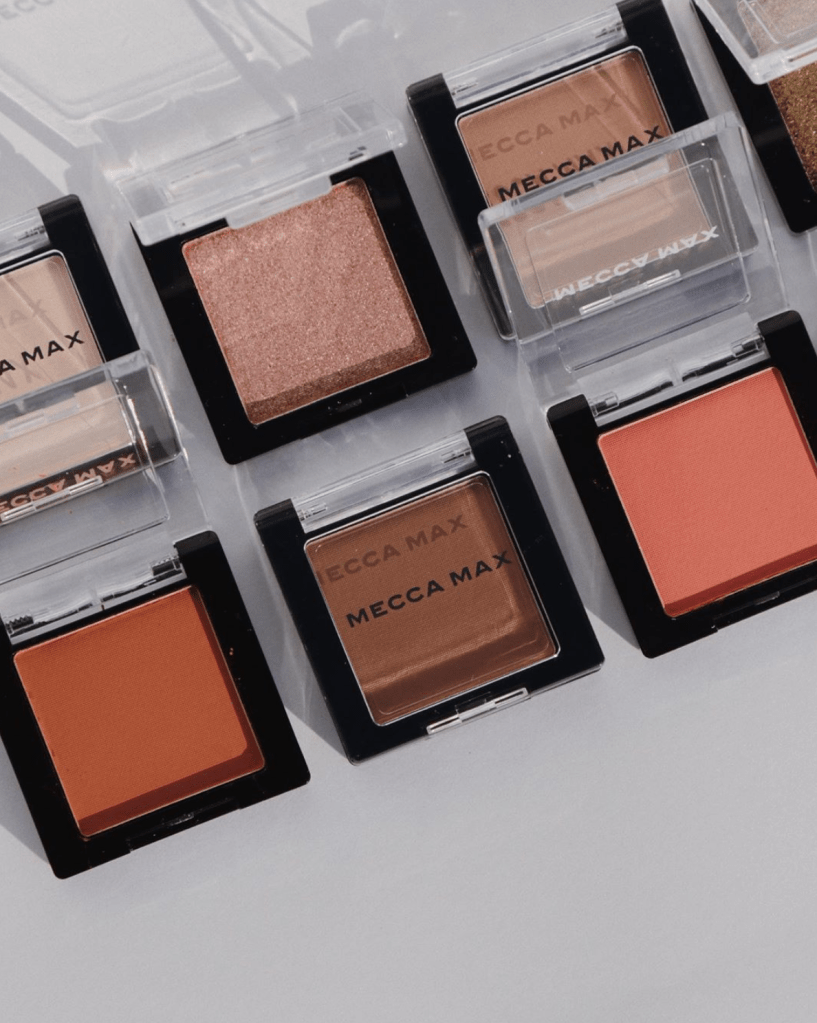
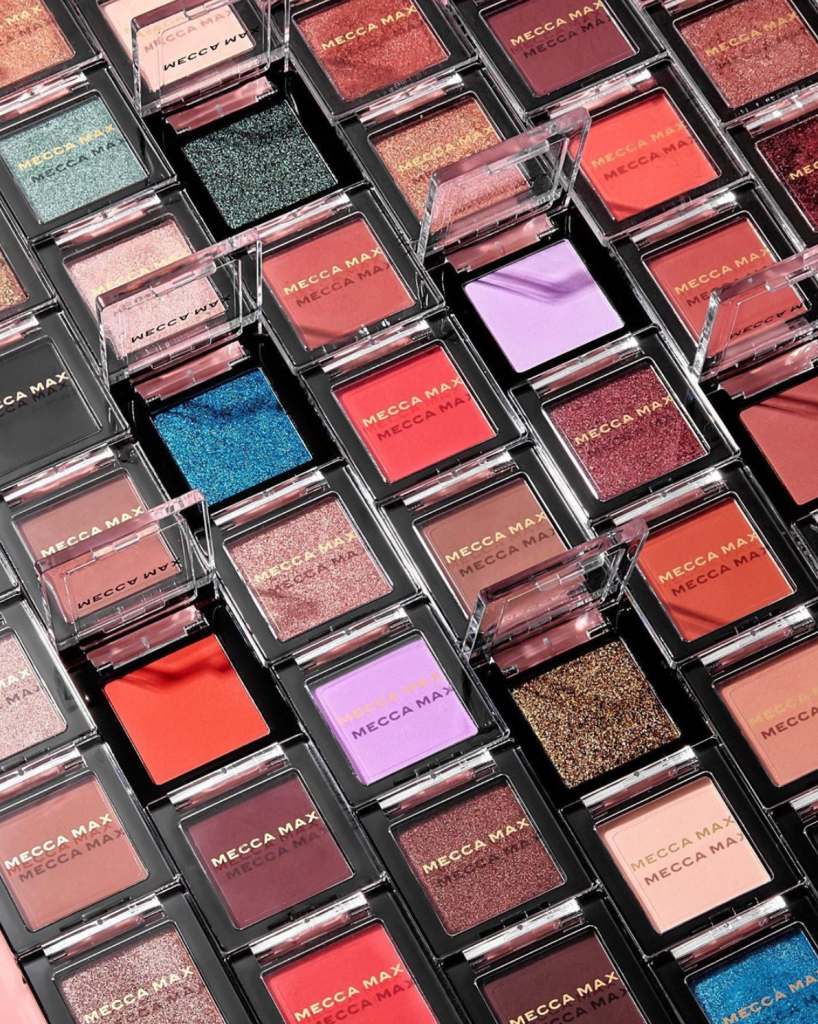
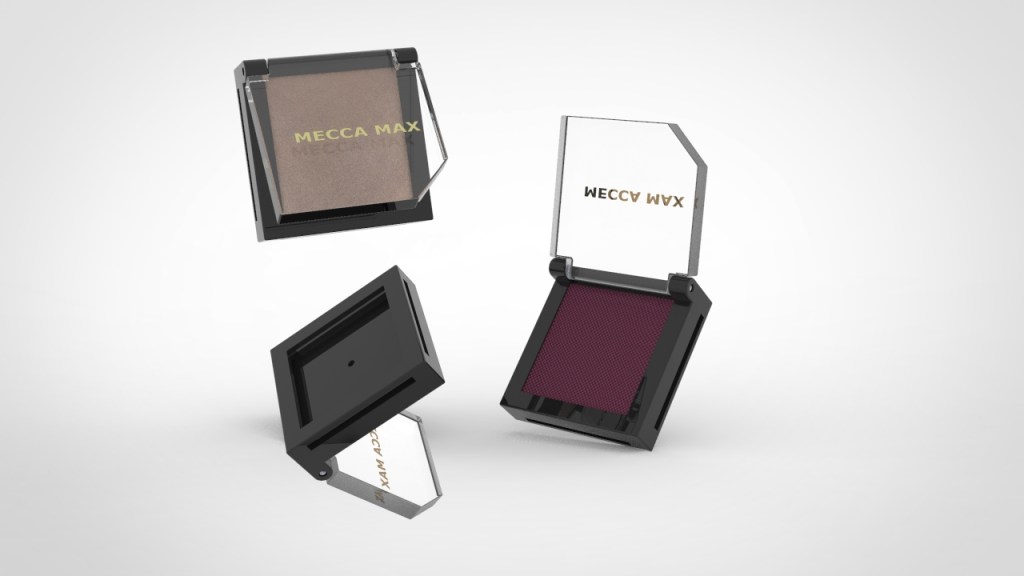
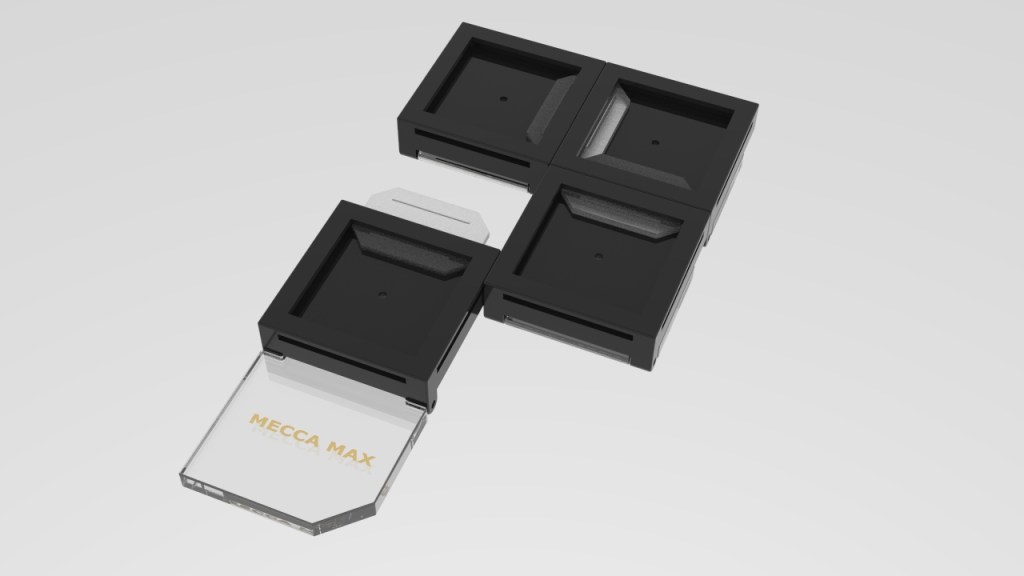
They say a picture says a 1000 words, right? That good hero shots won’t require numerous renders? And by the end there won’t be many questions? Hopefully? FYI the shades used for the shadows in the renders are actual colours from the MECCA MAX single shadow range!

Anyone who has been to MECCA probably has a MECCA sample pot laying around somewhere*
I’m still not sure if this was the best way to represent all the components but I really didn’t like the exploded view I did.

* So one of my main concerns was using more plastic to create the connectors. Sustainability is a growing concern in the beauty industry because there is so much waste and the industry is so large. Waste can come from the packaging the product comes in, fancy wrapping material to “enhance the experience”, PR packages sent out to influencers and the main one: products typically aren’t refillable so you’re constantly chucking out empty products to purchase a new one. I have seen more people try and upcycle their empty containers but there’s only so many empty jars and bottles that we can turn into succulent pots and vases.

More companies are using recycled and recyclable plastics. One of my favourite brands that does this is REN Skincare, they have pledged to become Zero Waste by 2021 meaning all of their packaging will be 100% recycled, recyclable and reusable ♪┏(・o・)┛♪┗ ( ・o・) ┓♪ (happy dance).

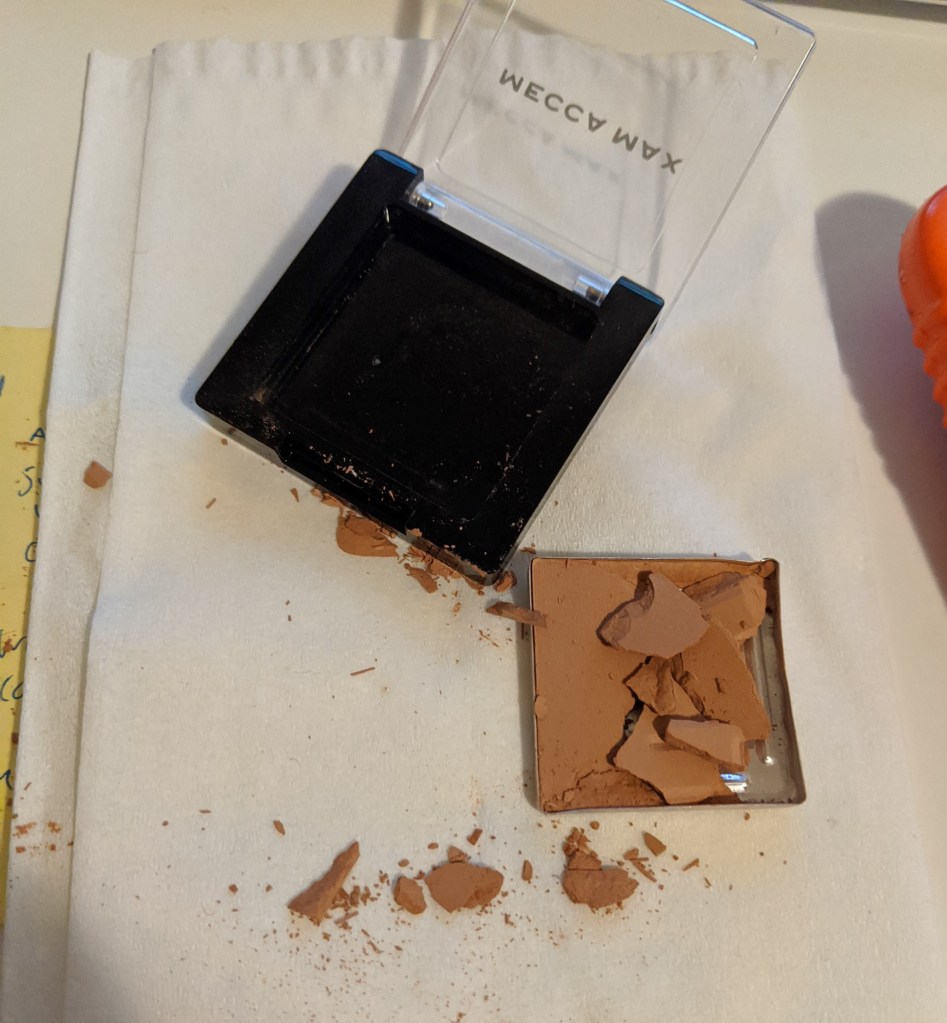
MECCA uses a program called TerraCycle which collects and recycles hard-to-recycle waste. MECCA has Beauty Products Zero Waste Boxes located in some of their stores so you can bring your empties in to recycle when you go in store to repurchase your products, which I think is pretty neat. However, while this is a great program it’s not advertised very well and I don’t think many customers know about it. MECCA also readily and happily provides samples in little sample pots for customers to try products before they commit to the full size. It’s part of their amazing customer service (if I may say so myself) but again, it creates so much waste. I’ve seen some people with baskets full of these sample pots, I did a quick look around my room and this is how many I had.

I do wash and reused them for those samples that come in sachets

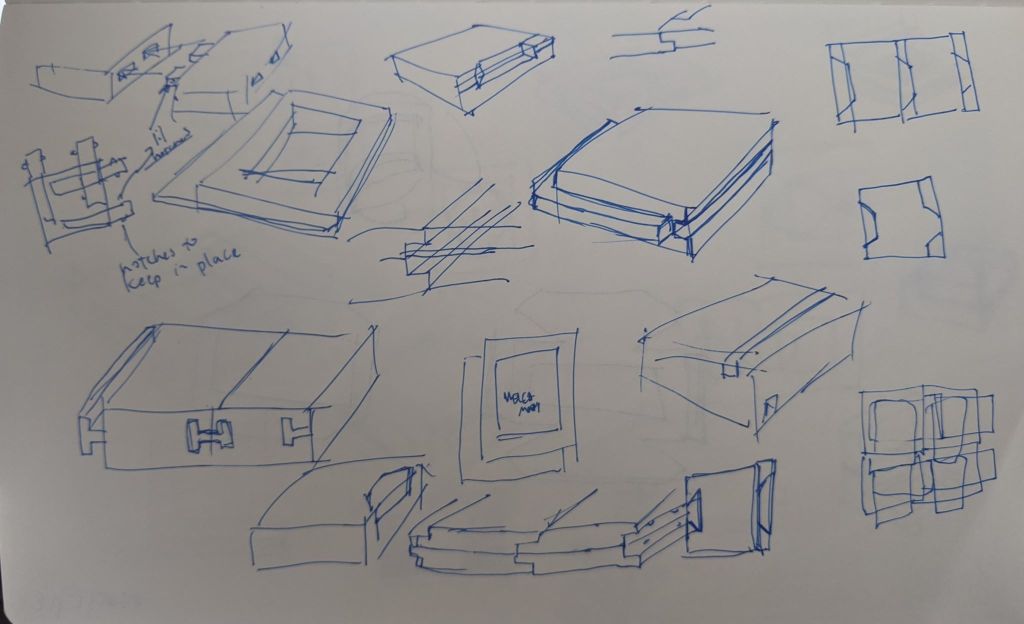
So going back to modular eyeshadows, I think it would be great if we could recycle the sample pots and use that plastic to create the connector tabs. We could do this locally as well by utilising the Precious Plastics system which is another great way to recycle plastics!

It’s been a long minute since I used KeyShot for rendering products but I think I did okay. I never actually really learnt how to use KeyShot properly or to it’s full potential but am hoping to learn more through these projects I do. This post turned out to be longer than I expected, just got a little too into talking about plastic. Next post will be about manufacturing and tooling design which will probably be a long one.

Bonus pics:

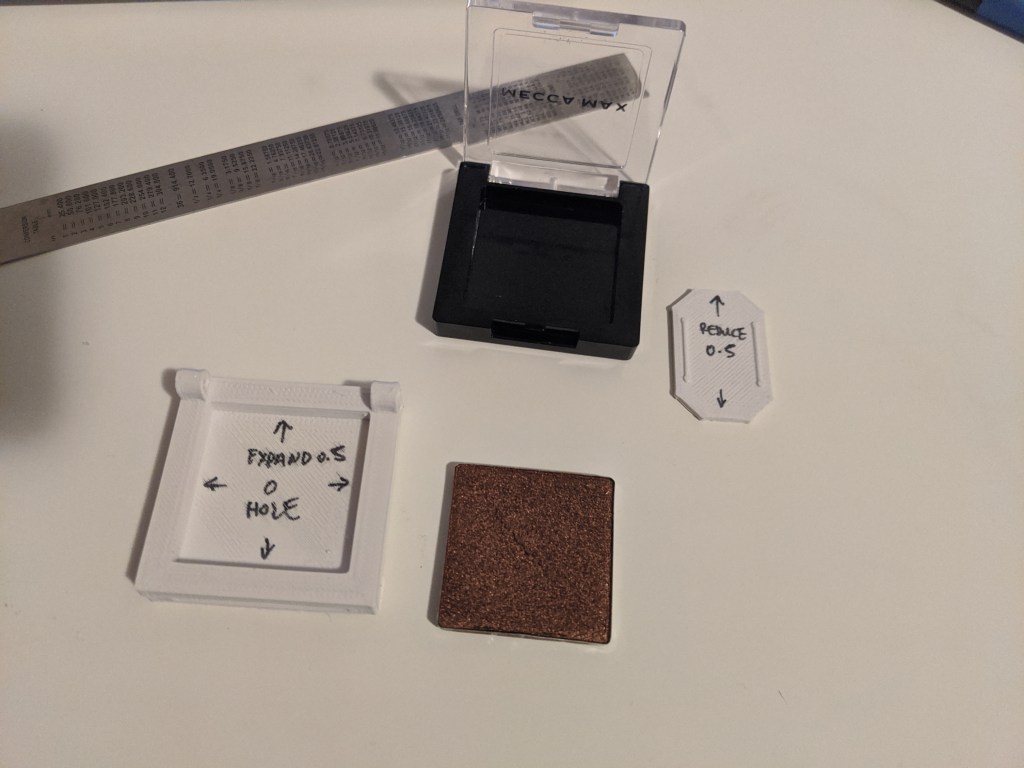
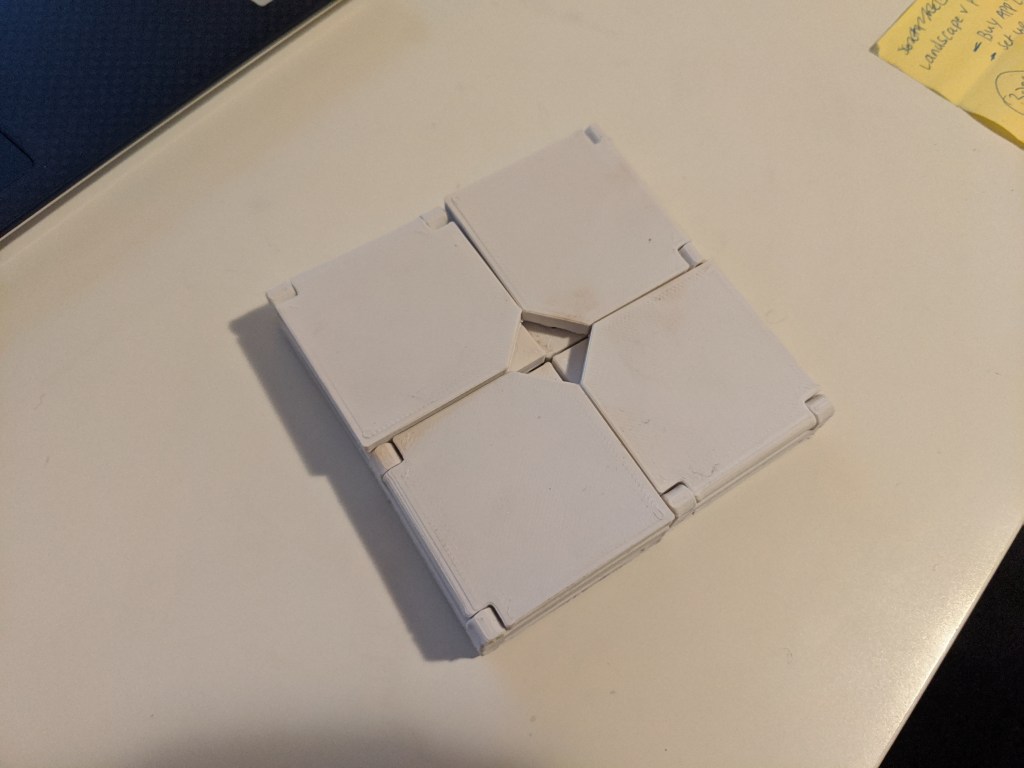
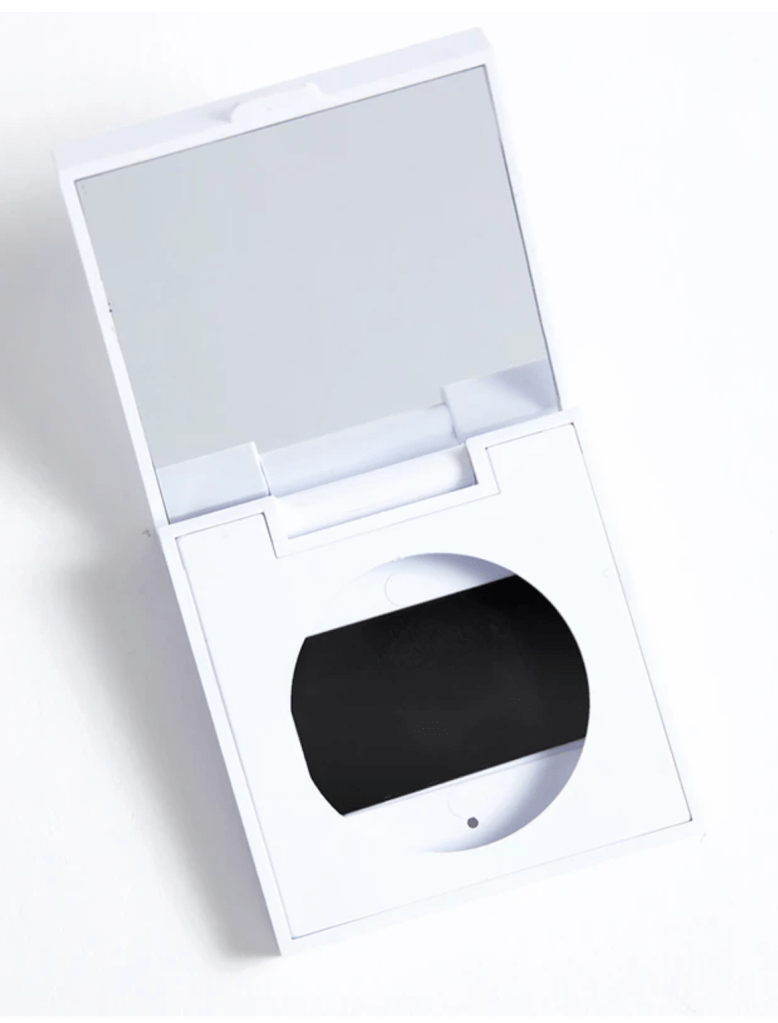
Anyway after all these renders, I realised there is a problem with the compact. Can you spot it? It’s not the uncentered MECCA MAX logo which is also annoying me.

Cracking eggs to make an omelette

Read Part 1 Single shadows and DIY palettes // Part 2 Lego makeup and tiles

Doing a bit of a different post format today. Mostly (bad) photos of the prototyping journey.

In theory, depotting eyeshadows isn’t difficult. You need something thin (I used a box cutter) to slide between the pan and the packaging to leverage the pan out. In reality, it can be quite a messy process. The pan is (I’m pretty sure) aluminium so it’s easily deformed and the shadow can crack when this happens.

I’ve only ever depot one eyeshadow palette before but that was a palette and cardboard packaging so I could slash the packaging and get underneath the pan properly without deforming the pan. From what I’ve read and watched on depotting tutorials, matte shadow formulas are more fragile than shimmer formulas so I started with the shimmer shadows first. I can confirm the shimmer shadows cracked significantly less.

Next came measuring the shadows and finding out the tolerance of the 3D printer. For me, I usually print with the dimensions as is +/- 0.5mm and then go from there. I also lay and print the model on different sides for each iteration. This is to test the support material and which side will create the least deformity. I have a real love/hate relationship with 3D printers. On one hand, it’s useful, on the other hand, are the deformities and time worth it? (Maybe I’ll write a post about this one day.)

3D printer: Ultimaker 3 Extended
Material: ABS

I also finally got to experiment with printing a hinge in place. I’ve always seen these models but I’ve never had the chance to create and print a model myself.

In the end I abandoned printing the hinge in place because there was more tolerance that I had to account for and the direction of print for it to be successful created a deformity that didn’t allow for the eyeshadow pan to drop in nicely.

I’m usually very bad at keeping track of the edits and different iterations so I’ve been trying to label the prototypes directly with editing notes on it. Usually I just had SolidWorks open and would edit the model directly but I know this isn’t a good method so I’m trying to change that.

Remember behind every successful prototype, there is a pile of not so successful prototypes

Final prototypes! The eyeshadow pans fit, the compacts slot together well and stay connected, the hinges are in place and I can configure it how I want.

Next post: product renders!

Lego makeup and tiles

Read part 1 for some context

The concept of modular design has always interested me. I like that the modules fit together neatly and are aligned. I also like the fact that you can interchange the modules and create your own configurations. I had first thought of modular makeup when I discovered the brand Jouer. At the time I discovered Jouer, their packaging was modular.

I don’t actually know how common knowledge this was within the beauty community that Jouer had interlocking packaging but I think they executed the concept well at the time. The long pans were 2x the length of the square pans. The liquid lipsticks and mascara was also the same length as the long pans. I also liked that they managed to make the liquid lipsticks and mascaras interlocked into the system as well. This meant you could essentially carry around a nice rectangle, full face palette that was connected together. Jouer also managed to add in some Lego design into the packaging to allow for compacts to be stacked.

The geometry of the interlocking system was basically the shapes you see in jigsaw puzzles but if you turned the jigsaw piece into a long 3D shape? A rail and slider? Probably easier to understand with some images…

Created in MS Paint – just one of many graphics editor programs I am skilled at

Hopefully that makes a bit more sense. This leads me to what I dislike about the packaging. The geometry used for the interlocking system creates extrudes that stick out the side and made the compacts feel and look bulky. It’s not something you want in your makeup packaging and most likely not the aesthetic makeup companies want to exude which is why I assumed Jouer has redesigned their packaging to be less bulky and look more sleek. This is at the expense of their interlocking system, but again I’m not sure how many people were actually aware of that so it probably wasn’t a major loss for Jouer customers. Jouer have also come out with more products that really wouldn’t suit an interlocking system. They did keep the liquid lipstick packaging the same though, possibly because of tooling or the packaging wasn’t that bulky for what the product is.

Nevertheless I did explore their original interlocking geometry as well as others in my initial sketches.

Hmm I really should annotate my sketches

The other issue I found in the Jouer system was that the compacts can only be connected left and right. You can continually connect the compacts side to side but it’ll eventually become too long especially when the packaging is bulky to begin with. This was the other challenge I wanted to try and find a solution for. This lead me to researching tessellating shapes. I came out the other end understanding how to create shapes that tessellate instead of finding simple, suitable geometry that I could implement into the design, but the more you know right? Some bomb tessellating patterns I came across:

When I refocused, I started researching tiles because they tessellate, need to fit together left/right/top/bottom and usually have simple enough geometry. The reason I wanted to keep the geometry simple is because of tooling costs. The MECCA MAX shadows sell for $8 each so manufacturing costs need to be quite low and having complex geometry would increase the price of manufacturing (more on tooling and manufacturing in an upcoming post). I came across some pretty unique and beautifully designed tiles:

I eventually realised ’tiles’ wasn’t the correct term to be researching. This is because tiles have a backing plate (the wall, the ground) that they stick to that allows for quite complex shapes to fit together and stay together. I changed my search term to ‘interlocking tiles’ and I probably should’ve been able to guess that this is what would pop up:

So I made it full circle back to the initial design. Regardless, I persisted with my research and eventually came across the following image in the depths (past page 1) of Google Images:

https://www.thebudgetdm.com/interlocking-tiles // I love and find it funny when I find inspiration from badly edited images on websites that look like it was created in ’98

I played around with this concept and thought about how the tooling would work and finally arrived at a solution.

The final component I needed to design was the lid. The current MECCA MAX lid has a snap closure that extends over the side as well as a hinge that comes out the back when you open the lid. This wouldn’t work when the compacts are connected together as you wouldn’t be able to access the opening and the hinge would move the compacts. It’s the same reason the Jouer compacts couldn’t be connected up and down, only side to side.

This was a simple enough issue to fix. I had to look at repositioning the hinge and creating a way for the compact to stay closed but also being able to open it when connected together.

I’m trying to improve my sketching and I think this was a good project to start with. I also thought I did more pages of sketching but I guess not – I will try improving the diversity of my ideas and getting thought onto paper. I will also trying making these posts more succinct, they feel a bit long for the information I’m trying to get across.

Next post: breaking and making.

Single shadows and DIY palettes

PS but at the start. I realise this may not be that interesting to the everyday person or even within the product design community but for potential employers – here’s a sample of my market research and product analysis abilities.

TL;DR I am redesigning the MECCA MAX single shadow compact and making it modular.

For those that don’t know, I work another job alongside my engineering job. I work at the beauty store MECCA! Their in-house brand, MECCA MAX, released single eyeshadows a couple(?) weeks ago (the days and weeks all blur together now).

I really like the concept of single shadows because I’m sure almost everyone who owns an eyeshadow palette has a couple shadows that are barely used in the palette, I know I do. Single shadows allow you to create your own eyeshadow palette where you like and will use all the colours (ideally).

There are definitely other brands out there that do this. The single shadow is usually packaged in either their own compact (like the MECCA MAX ones), or in a plastic/cardboard sleeve. The main brands that come to mind when I think about single shadows and DIY palettes is Makeup Geek and INGLOT.

Makeup Geek was the first brand that I saw do this and I’ve always thought it was pretty clever. You can create a DIY palette with shadows and face powders (blushes, bronzers, highlighters) – whatever could fit into the magnetic palette. They use to have circular pans but have since redesigned their packaging so the pans are square. I personally like the square pans more because there are less awkwardly shaped gaps between the pans.

INGLOT has a similar system to Makeup Geek but what I adore is that the pan dimensions are relative to each other. The eyeshadow pan dimensions are 1:1 and the face pan dimensions are 2:1 so the pans fit nicely next to each other and the edges are all aligned. Because of this, there are little to no gaps when put in the palette, unlike Makeup Geek. I understand why there are sizable gaps in the Makeup Geek palettes – it’s so you can use your finger to take the pans out. With the INGLOT system you need to use a pin or a thin object in the smalls gaps of the corners between the pans to lift the pan out.

What I also like about both of these is the packaging the single shadow comes in. It’s minimal, recyclable and much less wasteful than a whole compact. The problem with single shadows coming in their own individual compact is that it’s a big waste of material (usually plastic) and manufacturing power/material when you depot the shadow. There’s not much you can do with it once you depot it other than chuck it out. Also, it can be very hard to depot. Some companies do make it easier but it still leaves the issue of a pretty useless empty compact.

It’s fixable but it’s not enjoyable. What do I do with the empty compact? 😦
https://colourpop.com/products/shadow-compact // the little hole at the bottom allows people to stick a pin through the back to pop the pan out.

There is one main thing that I dislike about the current DIY palette system: the size of the empty palettes are predetermined, which of course makes sense. However, if you don’t have enough pans to fill the palette, you end up having empty space in the palette which is a waste of space on your table or when you’re travelling with it.

You can buy smaller empty palettes but what happens when you buy more? Upgrade to a larger empty palette. But then what do you do with the now smaller empty palette? ¯\_(ツ)_/¯

So that is what I have set out to do! Redesign the MECCA MAX single shadow compact to make it modular to allow for DIY palette creation without having to depot the shadow or throwing out an empty compact afterwards.

Next post: Sketching…and a little more market research!